WhatsApp now lets you backup your messages to Google Drive: here’s how
It's as easy as one, two, cloud
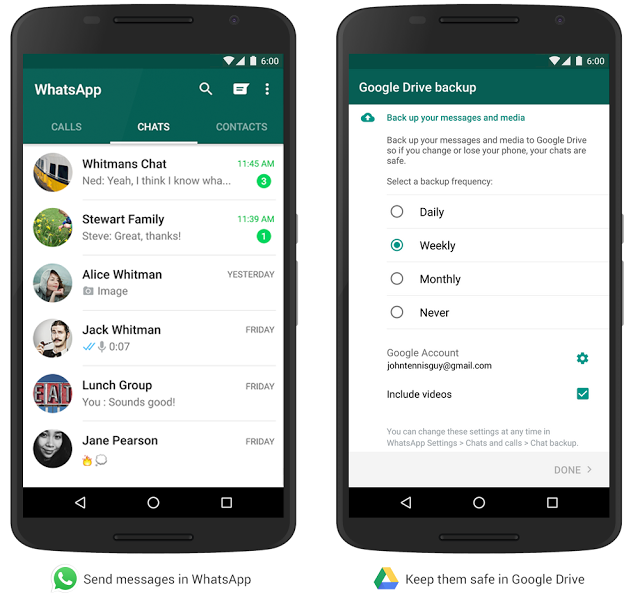
WhatsApp is the reason that our phones’ haptic feedback motors are working overtime.
From multiple group chats saturated with top notch #bants, to work talk and general messages that have replaced the use of SMS, it’s become a central hub in the way we communicate with people.
While you’ve been able to backup your messages to your local storage for some time now, an official cloud storage option has been sorely absent. Until now.
Android users (sorry Apple fans) can now officially setup their WhatsApp er, app, to automatically back everything up to Google Drive.
If that’s something you fancy doing (and it seems like a sensible choice to us) then here’s what you’ll need to do:
1. Check if you’ve already got it
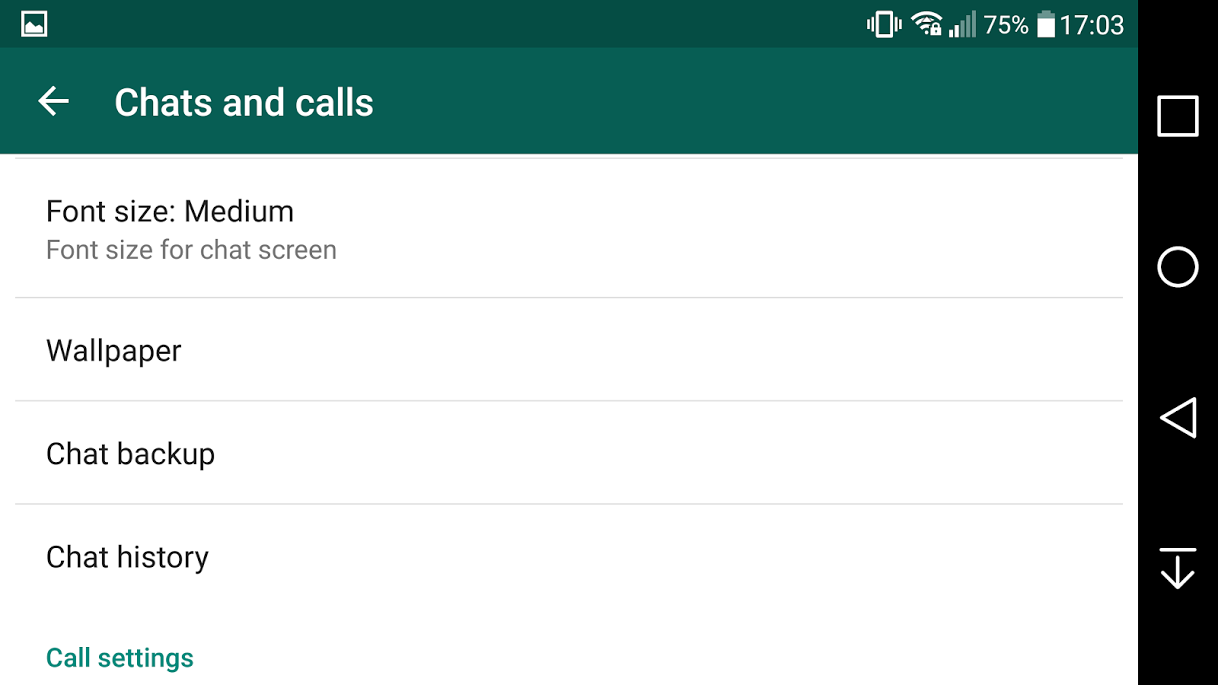
It’s a long shot on day one of the staggered update, but WhatsApp might have already updated on your device, with the new backup feature included. To see if that’s the case, hit up ‘Settings’, ‘Chats and calls’, and see if there’s a ‘Chat backup’ option listed.
If you can only see a ‘Backup’ option, then you’re going to need to manually update the app.
2. Auto-pilot disabled, manual override
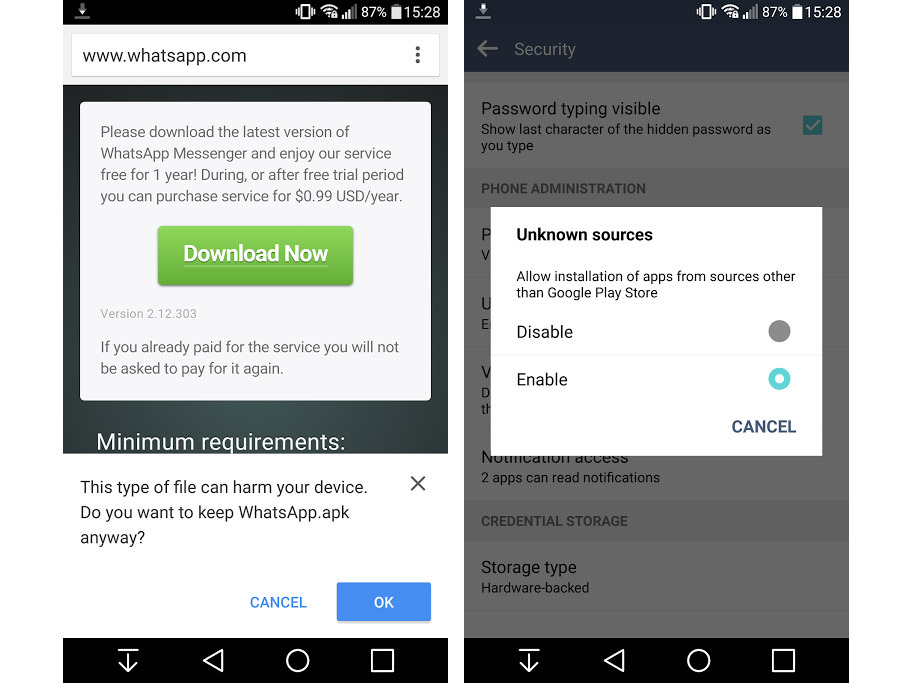
Head on over to WhatsApp’s site on your phone, to download the official .apk file. Once that’s done, you’re going to need to manually install it on your device.
We recommend uninstalling your current version, as that’s the only way we managed to get the newer .version to install.
Simply locate the .apk file in your downloads folder (it’s imaginatively called WhatsApp.apk), install it, and you’re ready for the next step.
Bear in mind that after we manually installed WhatsApp, the Play Store informed us that an app update was available. If you install the update from the Play Store, you’ll lose the new backup functionality. Just ignore that update prompt for the time being, until the Play Store app catches up with your 1337 sk1lls.
Hack into the mainframe
If your Android device won’t let you install the .apk and presents you with a security message, you’ll first need to allow the installation of third-party apps.
Go to your device ‘Settings’, then ‘Security’, and hit ‘Enable’ in the ‘Unknown sources’ section. Boom, job done.
3. Yo back up now and give a brother room
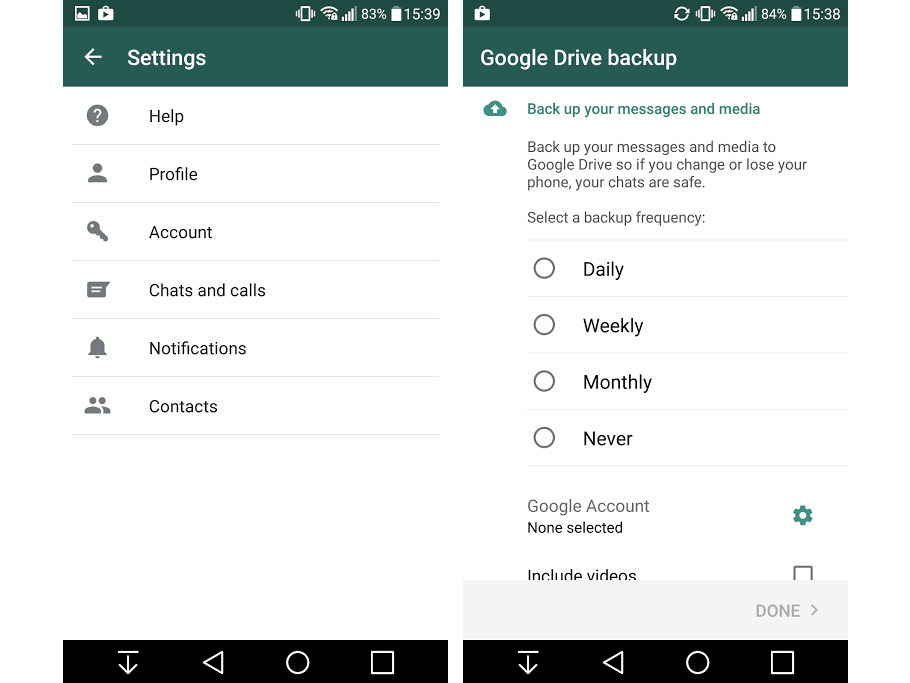
Once you’ve re-confirmed your WhatsApp phone number, you’re ready for the most thrilling step yet.
WhatsApp should automatically present you with a screen which lets you select how often you want to backup your messages, and which Google account you want to use. A few taps later, and that’s it, you’re sorted.
To manually go back and change the frequency or account used, go to ‘Settings’, ‘Chats and calls’, and this time, you should see a ‘Chat backup’ option, which will let you make your changes.
You can also backup manually from this screen (there’s a big green button, you can’t miss it), and the next time you install WhatsApp from fresh on any device, you can simply select the Google Drive backup option at the setup screen, to have all your up-to-date messages injected into your device, straight from the cloud.

