Get your Mac ready for OS X Yosemite
How to back-up your Mac or create a Yosemite partition - with ease

Apple fanboy? Then you’ll be wanting to install the open beta of OS X 10.10 Yosemite on your shiny MacBook or iMac. Well DON’T DO ANYTHING YET.
Sorry for shouting, but this is important.
Yes, we know you’ve read our hands-on preview, signed up, received your email from Apple and are just about to install – but wait. Yosemite is beta software. It’s not fully baked.
Unless you’re a combination of mad, crazy and insane, you’d be, well, mad, crazy and insane to install Yosemite on a Mac that you use on a day-to-day basis – at least if you haven’t prepared an escape route.
READ MORE: Apple iPhone 6 preview
BACK-UP YOUR MAC
You can install Yosemite right over your existing OS X, but if an app fails to work, or it nukes all your data, you’re pretty much stuffed, unless you’ve got a back-up – and most people don’t back-up.
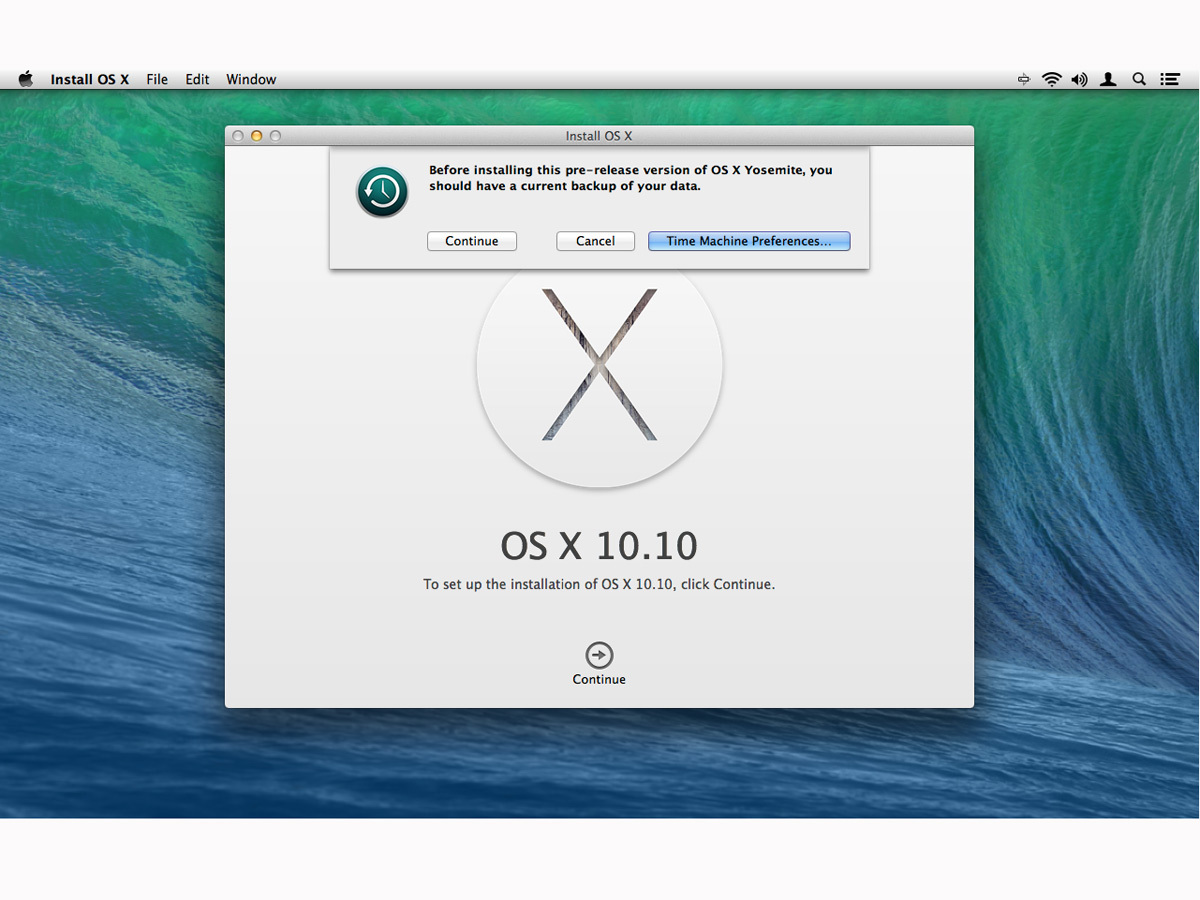
Just about the first thing Yosemite does is warn you to take a current back-up of your data, and it provides a handy link to Time Machine’s preferences.
Time Machine’s fine, but we instead recommend you download either Carbon Copy Cloner or SuperDuper! and make a clone of your Mac’s drive to an external hard drive.
Once that’s done (and, sorry to the impatient, but that can take a few hours), restart and hold down the Option (Alt) key. Select the back-up drive and restart from it, making sure everything’s working OK. If it is, restart again, but from your Mac’s internal drive and install Yosemite.
Should anything later go wrong, you can always boot from the clone (and even clone it back to your Mac’s internal drive).
A SEPARATE YOSEMITE INSTALL

If you just want to muck about with Yosemite rather than use it daily, there’s another option: install Yosemite somewhere else. Then use data from cloud services (iCloud, Dropbox, and so on) with Yosemite, meaning that will also be accessible to your main OS X install.
OS X can be installed on to an external drive (although unless it’s got a fast connection, the result may be sluggish). Alternatively, if your Mac’s drive still has plenty of spare storage space, you can create a separate partition for Yosemite.
(Note: if you have a Fusion Drive, don’t follow this process – this is only a straightforward option if you’re using a standard HDD or SDD.)
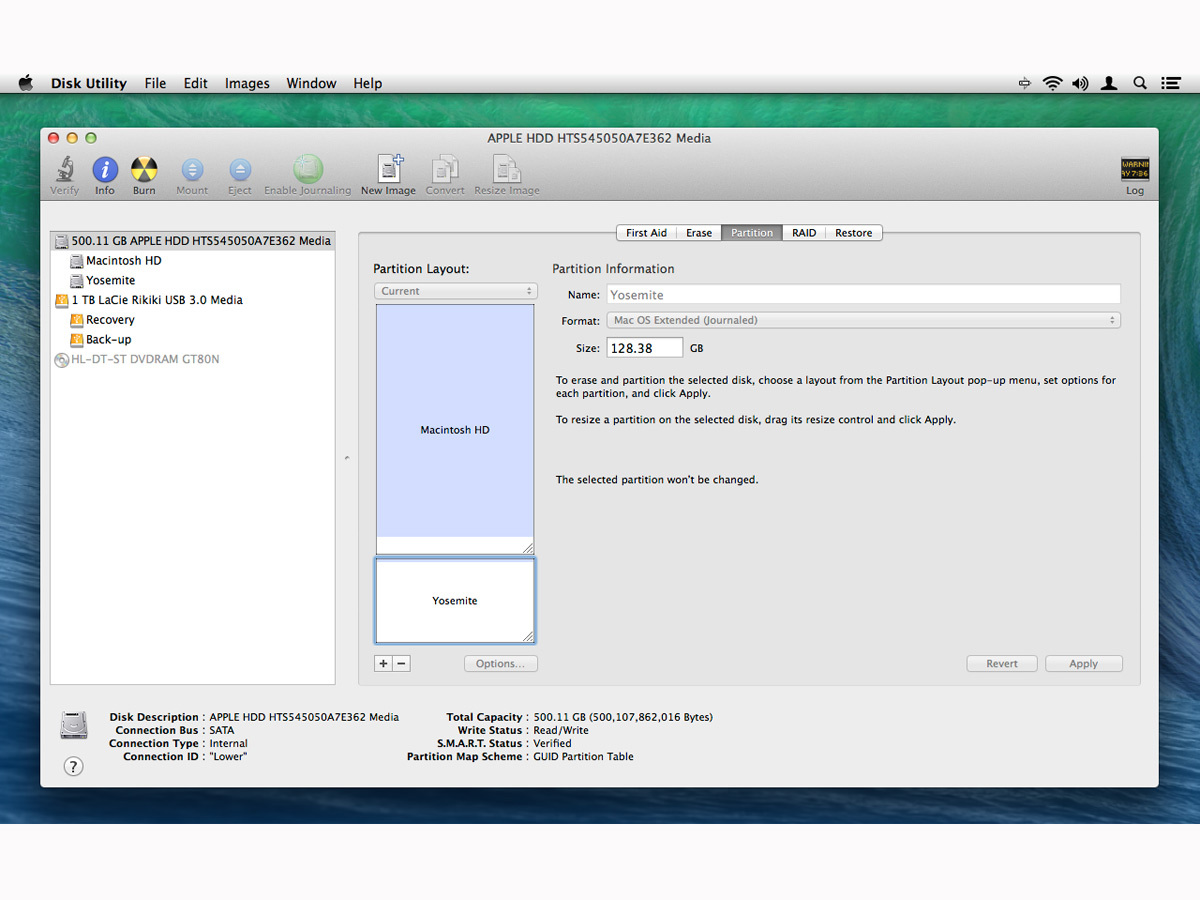
In Disk Utility, select your drive, click Partition, and click the + button. Select the second partition and drag the separator until its size is however much you want for Yosemite – Apple says 8GB minimum, but we’d say you need at least 20GB to test it properly.
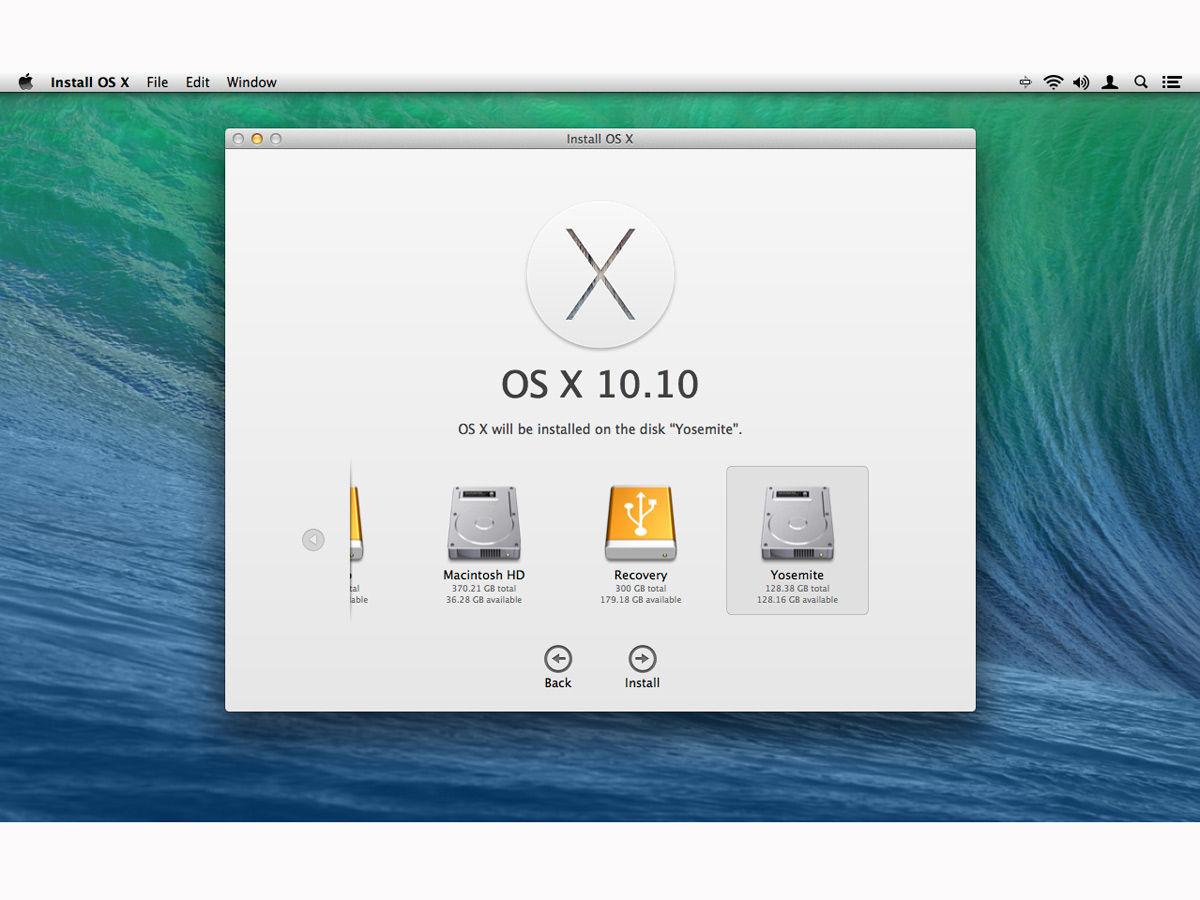
Once you’re done, click Apply and your drive will be non-destructively partitioned. You can then select it during the Yosemite install, and boot to it from Startup Disk in System Preferences or by holding Option (Alt) when restarting.
Note that when Yosemite is released this autumn, you can just delete the partition to get the space back on your Mac’s main drive.
See – that was easy enough. And trust us, you’ll sleep better having done it.
READ MORE: Mac OS X Yosemite beta hands-on preview


